Photog Man Do - Cat Doctor Takes on Photography
Traveling the world is one of my great pleasures in life. It expands my horizons and it’s good to get out of my comfort zone now and then. Like most travelers, I like to document my trip by taking lots of photographs. As the years go by and technology marches on, the cameras that I’ve taken with me have become obsolete. Well, not obsolete, per se. They just pale in comparison to some of the newer models. Lately, I’ve resorted to using my iPhone, as the megapixels and image quality have increased considerably with every new model that comes out. Plus they’re light and convenient, and barely take up any room in one’s pocket.
I recently decided to get into digital photography. I figure with the amount of traveling I do, and the cat pictures that I like to take, and this blog, I should probably bump up the quality a notch.
I had to choose between a point-and-shoot, and a DSLR. I knew that a DSLR camera was probably the way to go in terms of quality, but they are bulky. Whenever I see other travelers with these cumbersome cameras, they always look burdened, lugging this big, conspicuous camera with them. I wasn’t ready for that kind of commitment. So I did some research, and I found what I felt was the best point-and-shoot around, the Sony DSC-RX100 II.
It was just at the upper limit of size and weight for a comfortable travel camera. The camera apparently has a very large sensor for a point-and-shoot, and is 20.2 megapixels. So I bit the bullet and purchased it.
The instruction booklet for the camera was pretty terrible, especially for a camera of such complexity, so I purchased “Photographer’s Guide to the Sony DSC-RX100 II” by Alexander S. White. The book was immensely helpful and pointed out, in great detail (but in very easy-to-understand terms) all of the amazing things the camera could do.
I then went the extra step and enrolled in a digital photography course at PhotoManhattan, a photography school on West 14th Street here in NYC. The course was Digital Photography 1, and classes meet every Wednesday evening from 7:30 to 10:30. In every class, we learn something new, and we get to practice in class some of the techniques we discuss. We also are given homework assignments. Not surprisingly, my main models for many of the portraits are my cats, Mittens and Crispy. Although I love both of my cats equally, I will admit that Mittens is the more photogenic of the pair. I thought I would share some of the photos I’ve taken as I learn how to use the camera and perfect some of the techniques taught in class.
The very first pictures I took were of Crispy.

You can see how the camera really captures the detail. I took another one of her just chilling on the chair

Then I thought I’d get Mittens into the act, and I caught them both in a rare moment where they were in reasonable proximity to each other. They really don’t like each other, but they both wanted to sleep on that gray fleece. Mittens, with the ears back, has a very guilty look, while Crispy has that “get off my lawn” face.

In class we talked about portraits, and I tried a few at home, which was part of our homework assignment. I took this one, but didn’t use it as one of my homework submissions because I thought the exposure was too dark.

Proper exposure is very important, obviously. One of our assignments was to take a photo of something near a window. We were to focus on the item that was indoors, and get a proper exposure. In this case, a vase. If the vase was properly exposed, the stuff outside the window should be way overexposed. I tried it. You can see how overexposed the window is.

Then I exposed the window properly and the vase was very underexposed.

This exercise helped me nail down my exposure technique a little better.
Back to the portraits. The other portraits came out better. Mittens likes to hang out in my kitchen sink. I caught her in the sink and figured if I kept snapping away (I keep the shutter set to continuous exposure), one of the pictures would capture the essence of what she’s all about.
This one was mediocre, but I like it because her whiskers really stand out.

This one is cute, but it’s a little out of focus.

Finally! She went into the sink, and I went around the back of the counter, called her name, and started shooting. The perfect portrait. Look at those expressive eyes!

I used a wide aperture and moved in close, which gave a shallow depth of field. The result was that Mittens was in focus while the background was pleasingly blurry.
I took the camera into the office and decided to get a picture of our hospital cat, Topkea. I wanted to get close enough to get a good picture of the cataract in her left eye.

While at the office, I saw my technician Gina walking around with Spike, a cat who was boarding with us. When cats board at our hospital, we make sure we take them out and give them some mental stimulation. I took this cool picture of the two of them, which I used as part of my portrait homework project.

In our next class, we talked about motion and one of our assignments was to take a photo that demonstrated some type of motion. I went to Washington Square Park and saw a woman with one of those soap bubble set-ups, where she was dipping a loop made out of string and then creating large bubbles, much to the delight of a few kids in the park. I caught two very cool moments with the camera – this picture of a girl jumping up to try and pop the bubble with her face

And this one right after one of the bubbles exploded. The way the soap from the bubble hangs in the air, like smoke, is pretty neat

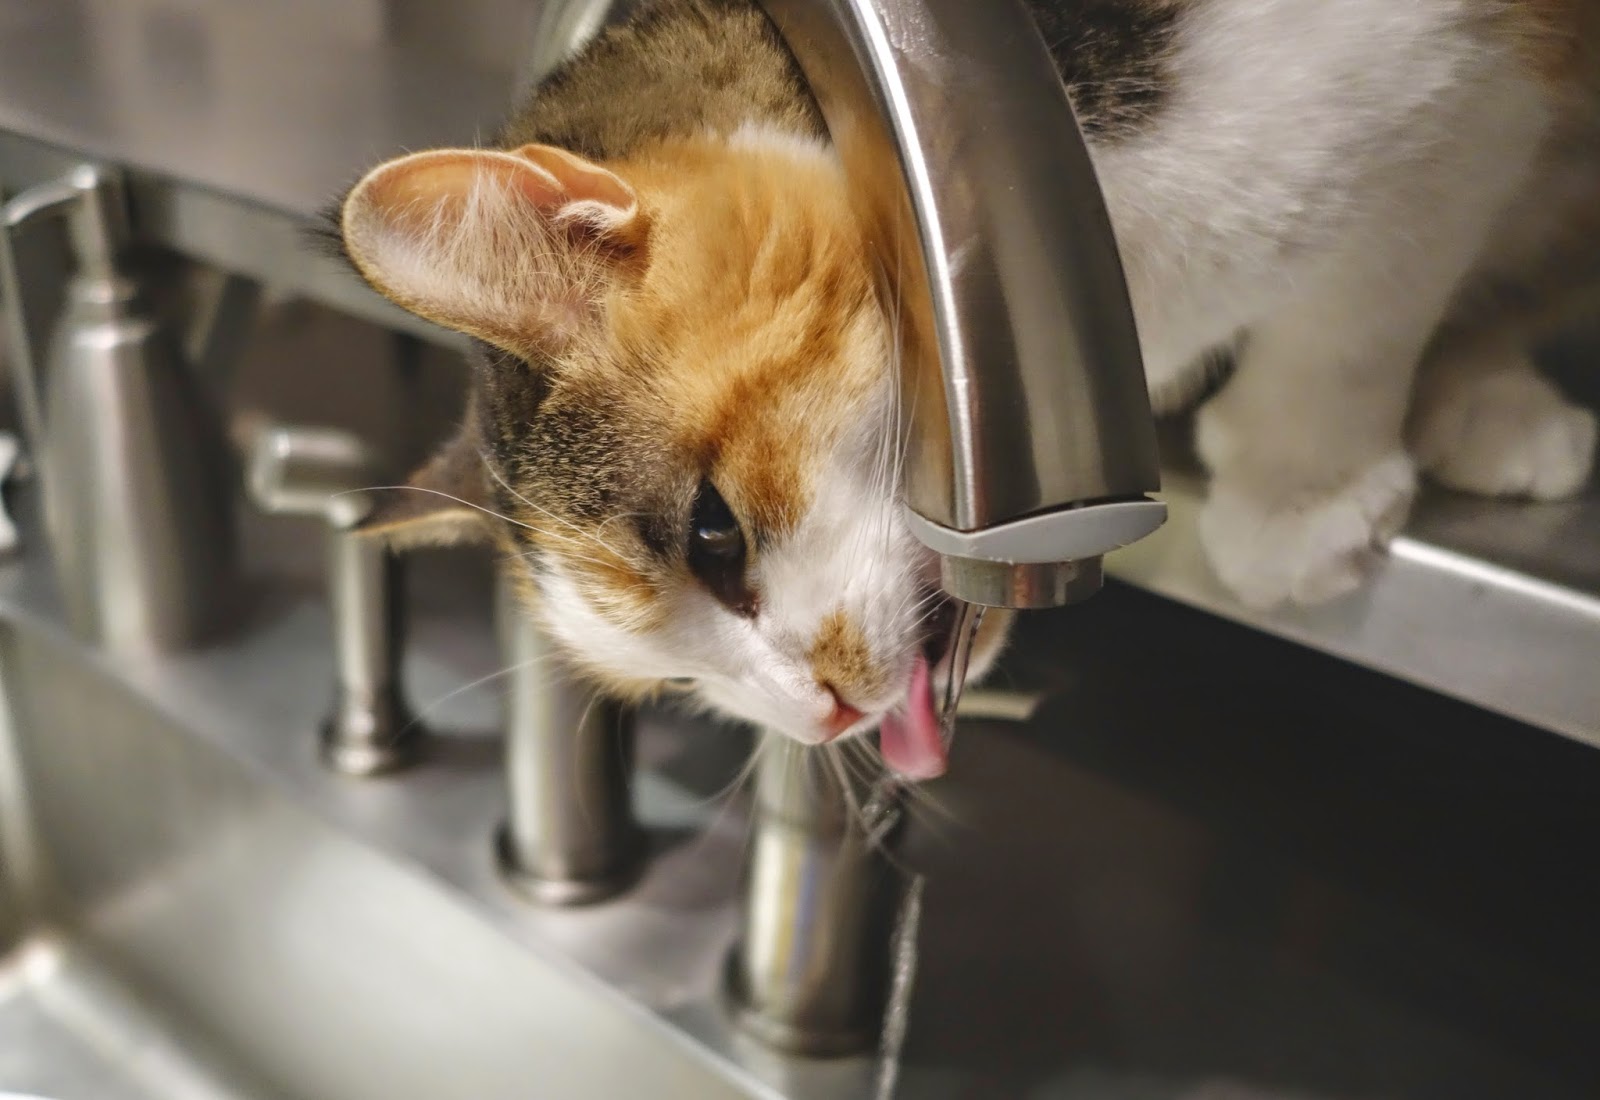
I also realized that, given Mittens’ penchant for drinking from the running faucet, I could probably get a good picture depicting motion if I just turn on the faucet and start snapping. Sure enough…
We continued learning about motion and blur. Most of us in the class were trying to improve our techniques because we were frustrated with “bad” blur in our photos, but blur doesn’t have to be all bad. Blur can add emotion to a photo if done well. One technique we learned is panning. This is where you set your shutter speed somewhere between 1/3 and 1/30 of a second, and then, as a moving object approaches, you wait until it’s pretty close, and then you start shooting, swiveling your body so that you follow the moving object with your camera, at the same speed as the object. The effect is that the moving object looks still, while the background is blurry. I tried it, and to my surprise, I got some pretty decent shots. Like this taxi

and this beefy dude on a bike.

Another motion assignment was to try to get streaming headlights from a car. This is done by using long shutter speeds, so that the headlights make a long streak. You have to hold the camera very steady, or use a tripod, so that the background is in focus. I didn’t have a tripod, so I just rested the camera on the side-view mirror of a parked car, and photographed a car going by. The motion of the car going by didn’t shake the camera appreciably, and the background was relatively focused.

Our next assignment was to play with depth of field (which I briefly mentioned before, with the great portrait of Mittens). The assignment was to photograph something so that it appears on the right side of the picture, in focus, while the background is blurred. To manipulate the depth of field, you can alter the aperture (wide aperture = blurry background), the focusing distance (close up focus = blurry background) and focal length (zoom in with a telephoto lens = blurry background). I took this one of some fruit, with Mittens and Mark blurred in the background.

Then Mittens had to come over to see what I was doing, of course, so I took one of her, nicely focused on the right, with the dining room table and vase properly blurred in the background.

The class on photo composition was my favorite. This was more artistic and less technical. We discussed what is perhaps the most well-known principle when composing photos, the “rule of thirds”. (This article explains it really well) When you look at an image, you should mentally superimpose a little tic-tac-toe board on the image, dividing it into thirds both horizontally and vertically. This now identifies four important parts of the image that the photographer should consider placing points of interest in, as the image is framed. When you place the image in the intersections of the lines, or on the lines themselves, our eyes naturally gravitate toward it, and the image just feels right. For example, the guy in the photo is placed along one of the vertical lines, and his eyes are close to where the vertical and horizontal lines intersect.
We also learned to look for and use “leading lines” in our photos. These lines serve as an “arrow” that point your eyes in the direction that you want the viewer to look. (A really good explanation, with examples) So, for one of my “leading lines” photos, I took this picture of Mark on our fire escape.

Notice how all the lines sort of converge on Mark, making your eye zoom right down to him. That’s the effect I was going for. His body is on the vertical line that lies one third of the way from the right edge of the photo. I probably should have put his head either a little higher or a little lower, so that it’s at an intersection point, but it’s close enough.
A better example is this one with Mittens.

Her body is on one of the vertical third lines; her head is at an intersection point, and the lines from the stainless steel counter lead right to her. My instructor said this was an excellent example.
At our last class, we were given an interesting homework assignment. We were to pick an object, and then try to photograph it in different ways using different techniques we were taught in class. I misunderstood the assignment. Apparently, you weren’t allowed to move the object. I didn’t realize that, so my object – a cinnamon raisin bagel – was posed in several ways. Naturally, I did recruit Mittens for part of it. In one photo, I utilized the technique of “framing”, in which something in the photo acts as frame for the subject.
So, here are two pictures of the bagel, one with the bagel in focus, one with the bagel out of focus. Where the bagel is in focus, Mittens is blurry, and where the bagel is out of focus, Mittens is sharp and clear:


Finally, here are two from the bagel series that have nothing to do with cats, but are the coolest photos I’ve taken, I think. Here’s another example of framing. I’m not going to tell you how I did this one.

And here, I was trying to do something… let’s just say it didn’t work out the way I expected, and yet, it yielded this freaky streaking-comet type of bagel that’s pretty artistic, I think.

Anyway… tonight is the last class. In a few weeks, I’m off to Morocco for ten days for vacation. There are apparently a TON of stray cats in Morocco, so I hope to get many excellent photos. Stay tuned.
I recently decided to get into digital photography. I figure with the amount of traveling I do, and the cat pictures that I like to take, and this blog, I should probably bump up the quality a notch.
I had to choose between a point-and-shoot, and a DSLR. I knew that a DSLR camera was probably the way to go in terms of quality, but they are bulky. Whenever I see other travelers with these cumbersome cameras, they always look burdened, lugging this big, conspicuous camera with them. I wasn’t ready for that kind of commitment. So I did some research, and I found what I felt was the best point-and-shoot around, the Sony DSC-RX100 II.
It was just at the upper limit of size and weight for a comfortable travel camera. The camera apparently has a very large sensor for a point-and-shoot, and is 20.2 megapixels. So I bit the bullet and purchased it.
The instruction booklet for the camera was pretty terrible, especially for a camera of such complexity, so I purchased “Photographer’s Guide to the Sony DSC-RX100 II” by Alexander S. White. The book was immensely helpful and pointed out, in great detail (but in very easy-to-understand terms) all of the amazing things the camera could do.
I then went the extra step and enrolled in a digital photography course at PhotoManhattan, a photography school on West 14th Street here in NYC. The course was Digital Photography 1, and classes meet every Wednesday evening from 7:30 to 10:30. In every class, we learn something new, and we get to practice in class some of the techniques we discuss. We also are given homework assignments. Not surprisingly, my main models for many of the portraits are my cats, Mittens and Crispy. Although I love both of my cats equally, I will admit that Mittens is the more photogenic of the pair. I thought I would share some of the photos I’ve taken as I learn how to use the camera and perfect some of the techniques taught in class.
The very first pictures I took were of Crispy.
You can see how the camera really captures the detail. I took another one of her just chilling on the chair
Then I thought I’d get Mittens into the act, and I caught them both in a rare moment where they were in reasonable proximity to each other. They really don’t like each other, but they both wanted to sleep on that gray fleece. Mittens, with the ears back, has a very guilty look, while Crispy has that “get off my lawn” face.
In class we talked about portraits, and I tried a few at home, which was part of our homework assignment. I took this one, but didn’t use it as one of my homework submissions because I thought the exposure was too dark.
Proper exposure is very important, obviously. One of our assignments was to take a photo of something near a window. We were to focus on the item that was indoors, and get a proper exposure. In this case, a vase. If the vase was properly exposed, the stuff outside the window should be way overexposed. I tried it. You can see how overexposed the window is.
Then I exposed the window properly and the vase was very underexposed.
This exercise helped me nail down my exposure technique a little better.
Back to the portraits. The other portraits came out better. Mittens likes to hang out in my kitchen sink. I caught her in the sink and figured if I kept snapping away (I keep the shutter set to continuous exposure), one of the pictures would capture the essence of what she’s all about.
This one was mediocre, but I like it because her whiskers really stand out.
This one is cute, but it’s a little out of focus.
Finally! She went into the sink, and I went around the back of the counter, called her name, and started shooting. The perfect portrait. Look at those expressive eyes!
I used a wide aperture and moved in close, which gave a shallow depth of field. The result was that Mittens was in focus while the background was pleasingly blurry.
I took the camera into the office and decided to get a picture of our hospital cat, Topkea. I wanted to get close enough to get a good picture of the cataract in her left eye.
While at the office, I saw my technician Gina walking around with Spike, a cat who was boarding with us. When cats board at our hospital, we make sure we take them out and give them some mental stimulation. I took this cool picture of the two of them, which I used as part of my portrait homework project.
In our next class, we talked about motion and one of our assignments was to take a photo that demonstrated some type of motion. I went to Washington Square Park and saw a woman with one of those soap bubble set-ups, where she was dipping a loop made out of string and then creating large bubbles, much to the delight of a few kids in the park. I caught two very cool moments with the camera – this picture of a girl jumping up to try and pop the bubble with her face
And this one right after one of the bubbles exploded. The way the soap from the bubble hangs in the air, like smoke, is pretty neat
I also realized that, given Mittens’ penchant for drinking from the running faucet, I could probably get a good picture depicting motion if I just turn on the faucet and start snapping. Sure enough…
We continued learning about motion and blur. Most of us in the class were trying to improve our techniques because we were frustrated with “bad” blur in our photos, but blur doesn’t have to be all bad. Blur can add emotion to a photo if done well. One technique we learned is panning. This is where you set your shutter speed somewhere between 1/3 and 1/30 of a second, and then, as a moving object approaches, you wait until it’s pretty close, and then you start shooting, swiveling your body so that you follow the moving object with your camera, at the same speed as the object. The effect is that the moving object looks still, while the background is blurry. I tried it, and to my surprise, I got some pretty decent shots. Like this taxi
and this beefy dude on a bike.
Another motion assignment was to try to get streaming headlights from a car. This is done by using long shutter speeds, so that the headlights make a long streak. You have to hold the camera very steady, or use a tripod, so that the background is in focus. I didn’t have a tripod, so I just rested the camera on the side-view mirror of a parked car, and photographed a car going by. The motion of the car going by didn’t shake the camera appreciably, and the background was relatively focused.
Our next assignment was to play with depth of field (which I briefly mentioned before, with the great portrait of Mittens). The assignment was to photograph something so that it appears on the right side of the picture, in focus, while the background is blurred. To manipulate the depth of field, you can alter the aperture (wide aperture = blurry background), the focusing distance (close up focus = blurry background) and focal length (zoom in with a telephoto lens = blurry background). I took this one of some fruit, with Mittens and Mark blurred in the background.
Then Mittens had to come over to see what I was doing, of course, so I took one of her, nicely focused on the right, with the dining room table and vase properly blurred in the background.
The class on photo composition was my favorite. This was more artistic and less technical. We discussed what is perhaps the most well-known principle when composing photos, the “rule of thirds”. (This article explains it really well) When you look at an image, you should mentally superimpose a little tic-tac-toe board on the image, dividing it into thirds both horizontally and vertically. This now identifies four important parts of the image that the photographer should consider placing points of interest in, as the image is framed. When you place the image in the intersections of the lines, or on the lines themselves, our eyes naturally gravitate toward it, and the image just feels right. For example, the guy in the photo is placed along one of the vertical lines, and his eyes are close to where the vertical and horizontal lines intersect.
We also learned to look for and use “leading lines” in our photos. These lines serve as an “arrow” that point your eyes in the direction that you want the viewer to look. (A really good explanation, with examples) So, for one of my “leading lines” photos, I took this picture of Mark on our fire escape.
Notice how all the lines sort of converge on Mark, making your eye zoom right down to him. That’s the effect I was going for. His body is on the vertical line that lies one third of the way from the right edge of the photo. I probably should have put his head either a little higher or a little lower, so that it’s at an intersection point, but it’s close enough.
A better example is this one with Mittens.
Her body is on one of the vertical third lines; her head is at an intersection point, and the lines from the stainless steel counter lead right to her. My instructor said this was an excellent example.
At our last class, we were given an interesting homework assignment. We were to pick an object, and then try to photograph it in different ways using different techniques we were taught in class. I misunderstood the assignment. Apparently, you weren’t allowed to move the object. I didn’t realize that, so my object – a cinnamon raisin bagel – was posed in several ways. Naturally, I did recruit Mittens for part of it. In one photo, I utilized the technique of “framing”, in which something in the photo acts as frame for the subject.
So, here are two pictures of the bagel, one with the bagel in focus, one with the bagel out of focus. Where the bagel is in focus, Mittens is blurry, and where the bagel is out of focus, Mittens is sharp and clear:
Finally, here are two from the bagel series that have nothing to do with cats, but are the coolest photos I’ve taken, I think. Here’s another example of framing. I’m not going to tell you how I did this one.
And here, I was trying to do something… let’s just say it didn’t work out the way I expected, and yet, it yielded this freaky streaking-comet type of bagel that’s pretty artistic, I think.
Anyway… tonight is the last class. In a few weeks, I’m off to Morocco for ten days for vacation. There are apparently a TON of stray cats in Morocco, so I hope to get many excellent photos. Stay tuned.
Comments
Post a Comment